Keeping track of sales performance of your business and getting each salesperson’s performance metric can be a tedious task in itself.
In this post, we will discuss how you can utilize the Sales Performance OS developed in Notion.
It helps you acquire crucial metrics related to sales in your business, including the performance of individual salespersons, the sales channels utilized, the locations where items are sold, and more.
In order to use this dashboard we need to set up the sales target for each month in relation to salesperson, sales channels used and the sales location to where we are making the sales.
But before that let’s have a quick overview of the Sales Performance OS to get an idea of how exactly it will operate.
Overview of the Notion Sales Performance OS
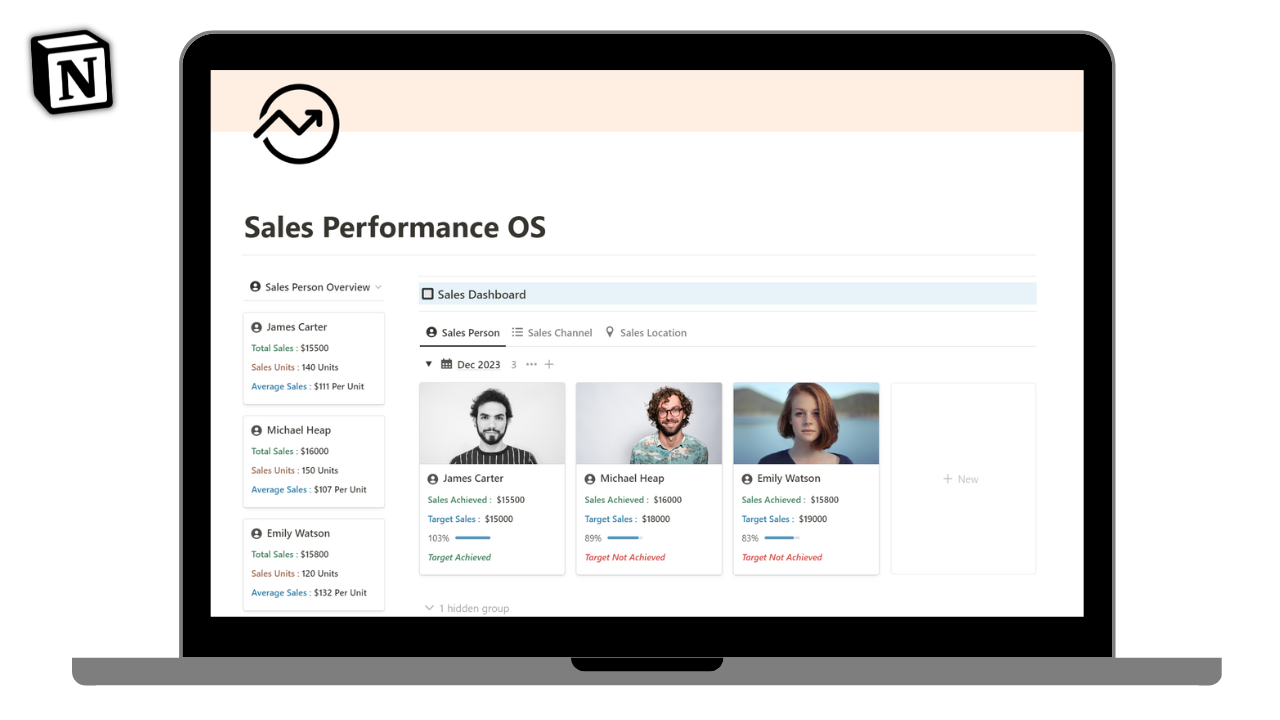
1. Sales Dashboard
The dashboard has 3 different views which serve their own purpose.
Sales Person
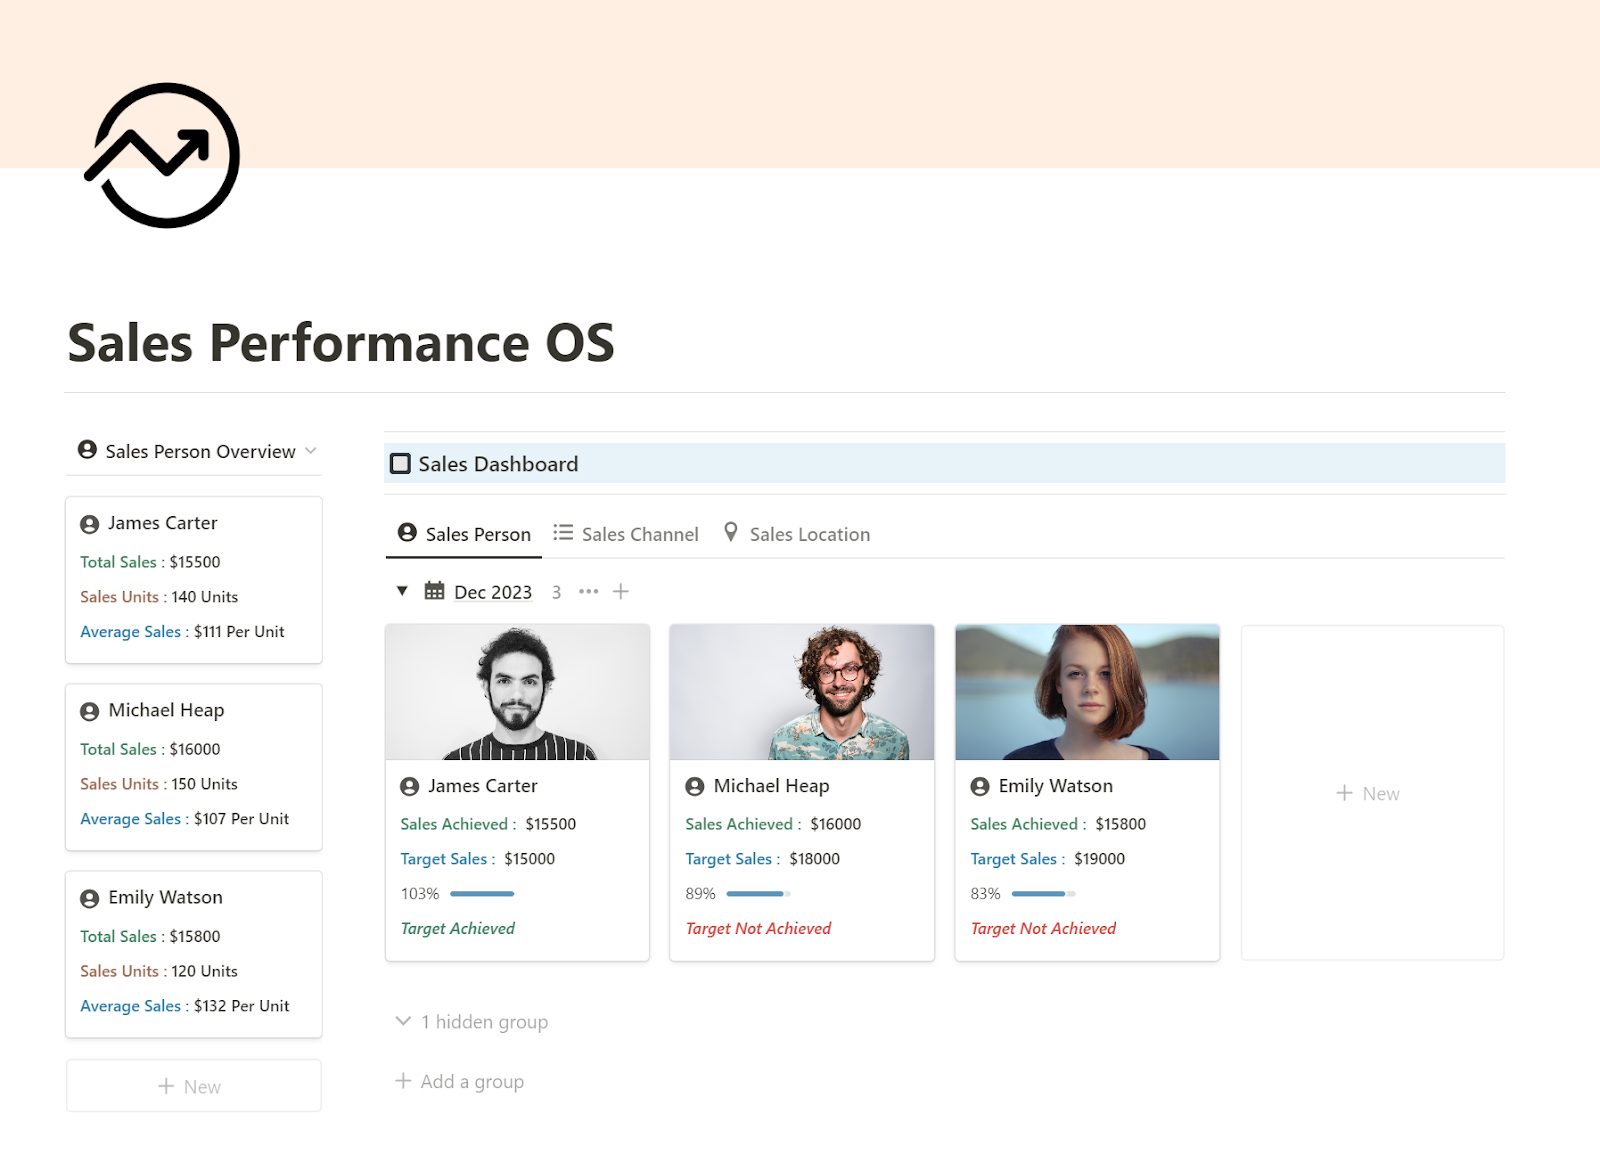
This shows the actual sales achieved by a salesperson in a month, targeted sales for the month, sales to target (in %) and Performance indicator which reflects if they have achieved the sales target or not.
Sales Channel
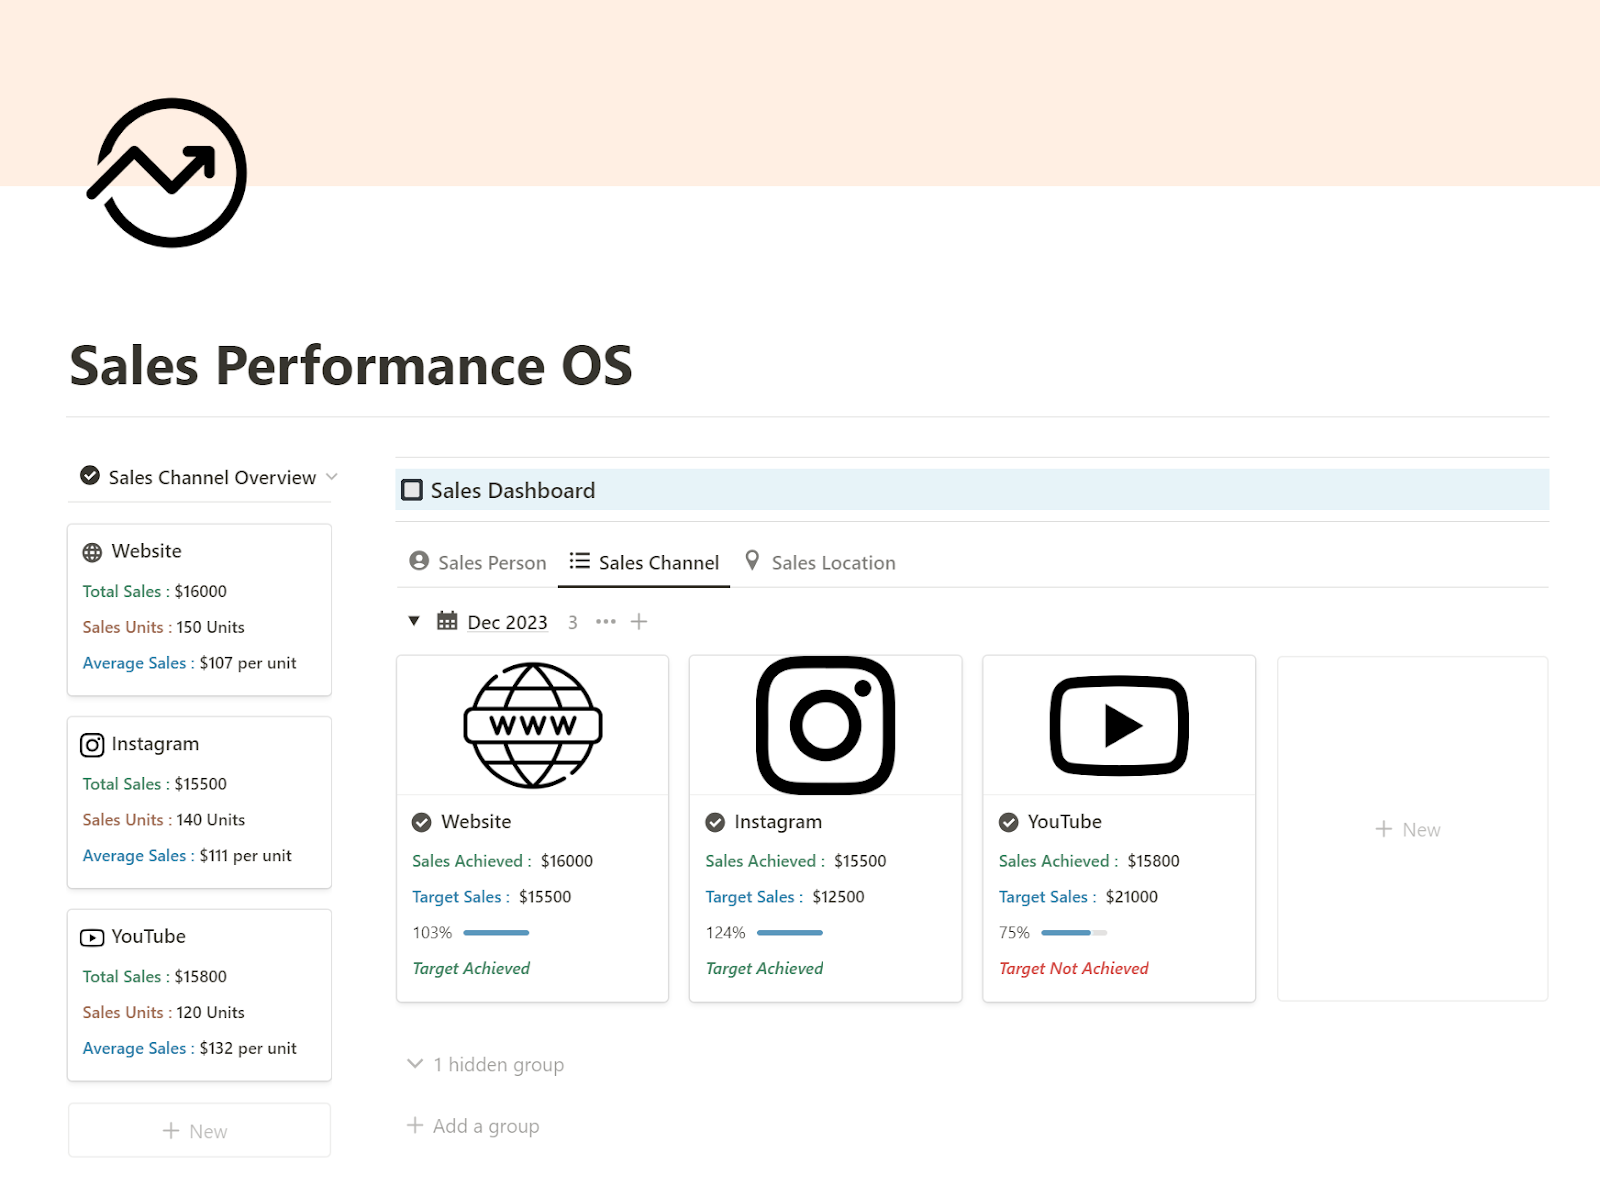
This shows the actual sales for each sales channel (such as YouTube, Instagram), targeted sales for the month, sales to target (in %) and Performance indicator which reflects if the sales target has been reached or not.
Sales Location
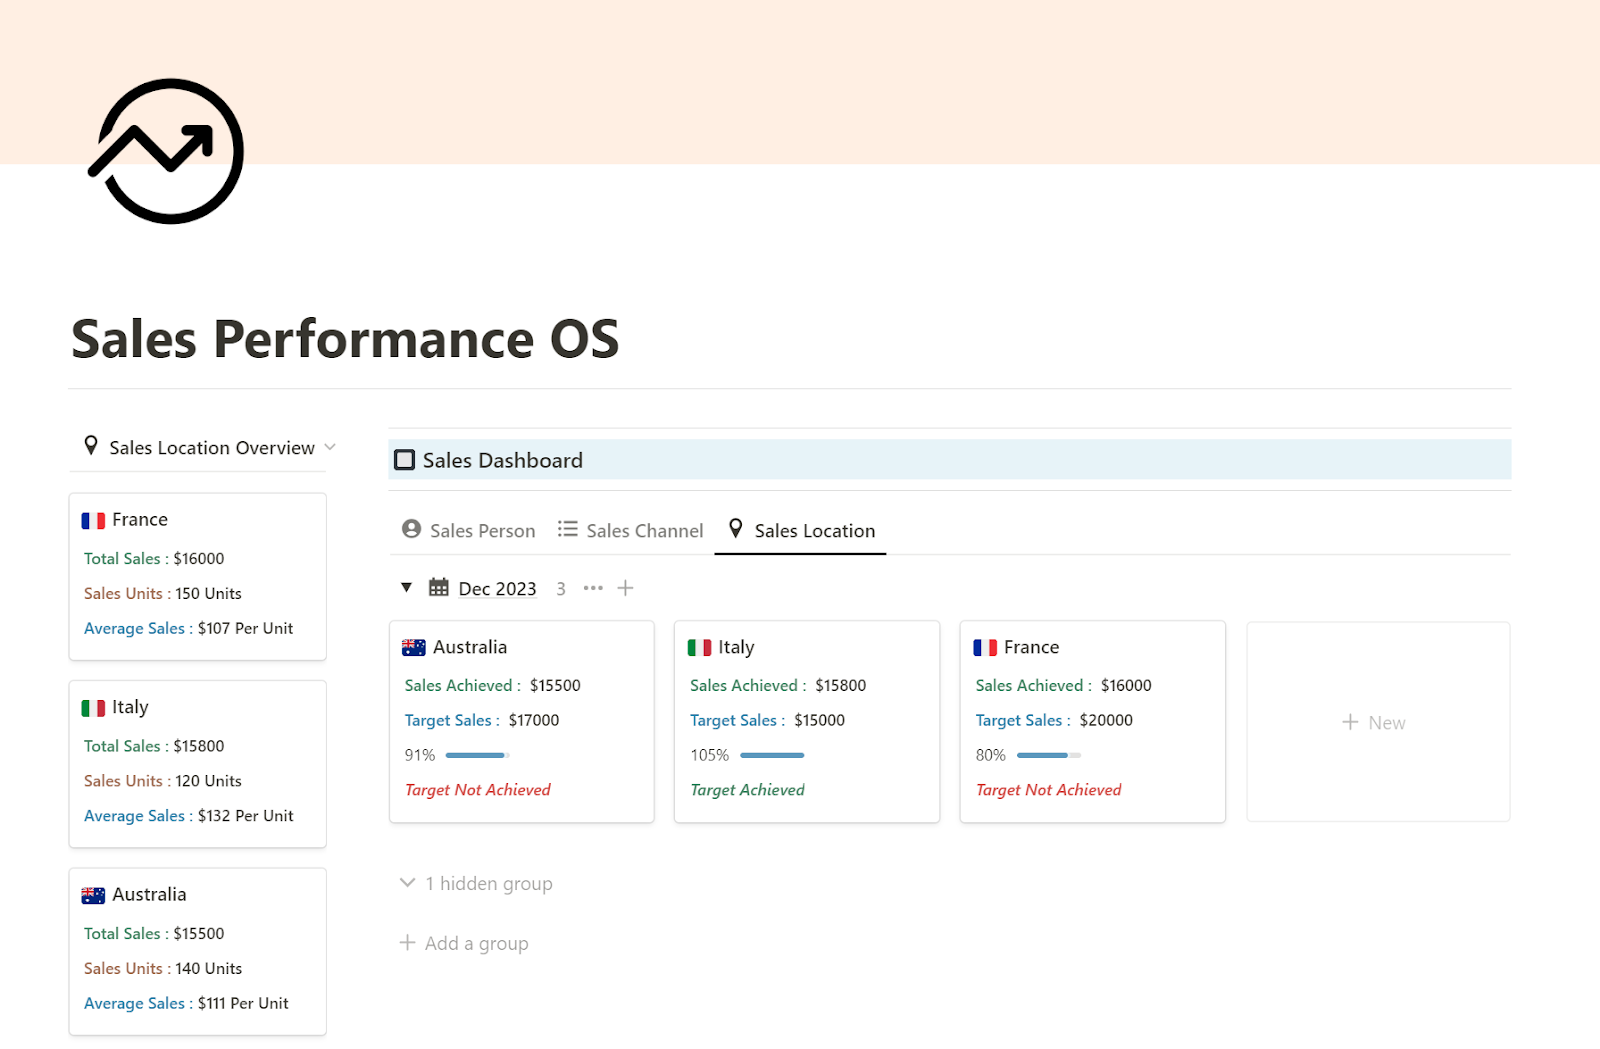
This shows the actual sales for a location (such as Australia, Italy, France etc), targeted sales for the month, sales to target (in %) and Performance indicator which reflects if the sales target has been reached or not.
This will be updated instantly as you enter the transactions related to the sales made (discussed below).
2. Sales Transaction
This is where we will enter the sales transactions related to each sales person, add the sales channels used for each sale and also tag in the sales location for the sale made (as discussed below).
1. Sales Person
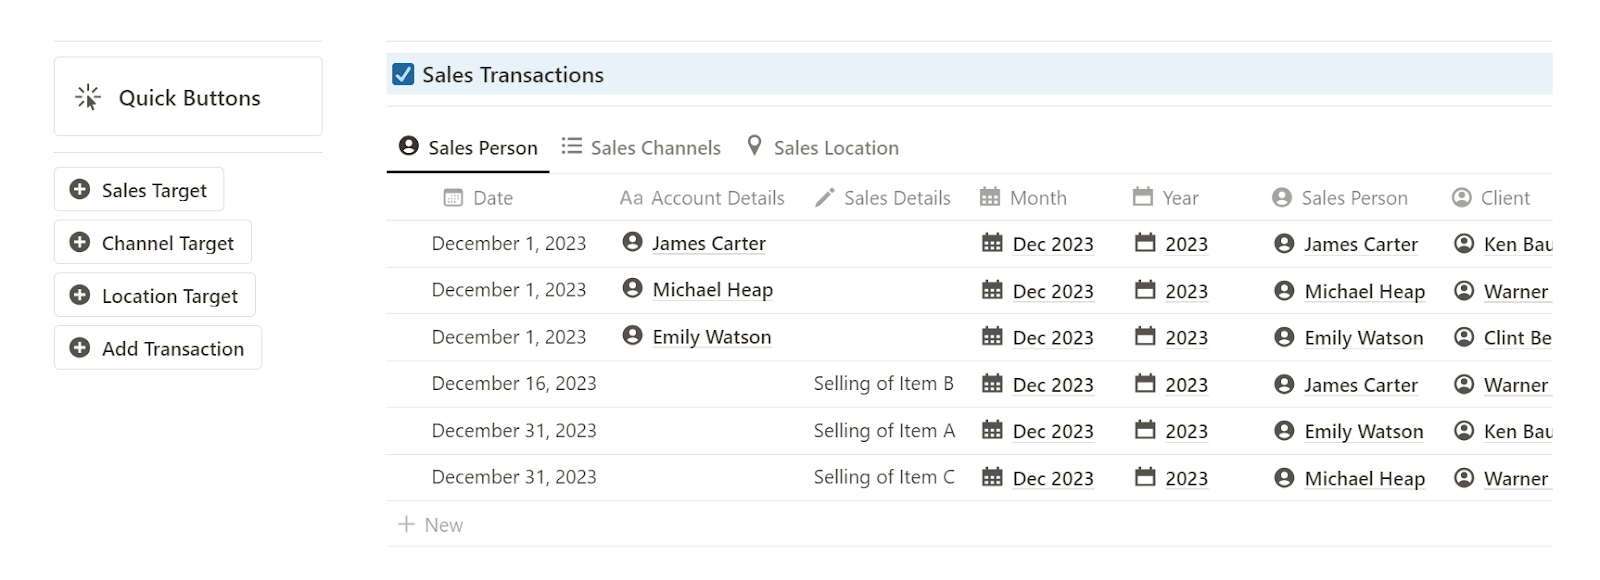
Under SalesPerson, we get to see all the sales transactions entered with the addition of the sales person for each of the sales made.
There’s also a quick action button to the left, “Sales Target” where we can specify the sales target for each sales person at the start of the month.
Once a sales target is set for a sales person, we can use the “Add Transaction” button to add a sale transaction and then add other details associated with it.
For each sale made, we can add a sales tag to add a tag to the person’s name with the month and the year that has helped to make the sale.
2. Sales Channel
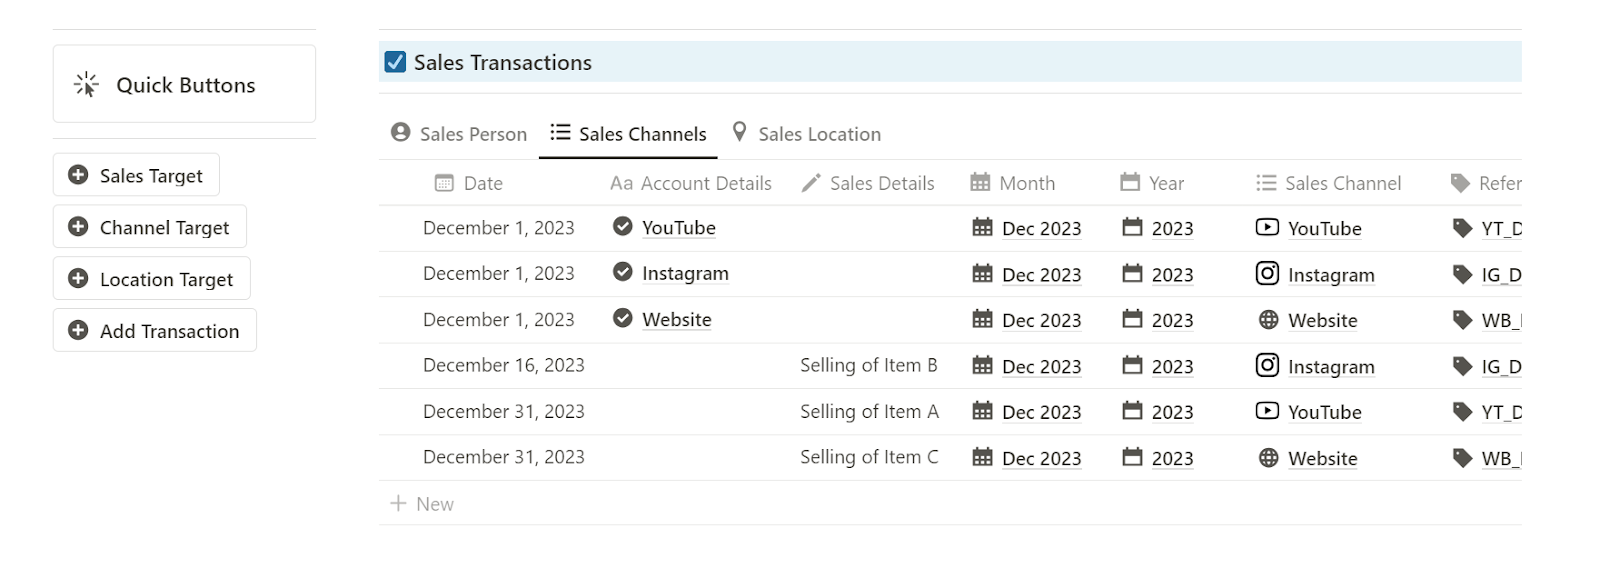
Under the Sales Channel, we get to see all the sales transactions entered with the addition of the sales channel used for each of the sales made (eg YouTube, Facebook, Website etc)
There’s also a quick action button to the left, “Channel Target” where we can specify the sales target for each sales channel at the start of the month.
For each sale made, you can add a channel tag to the sales channel source.
This includes the month and year for which the sale was made.
3. Sales Location
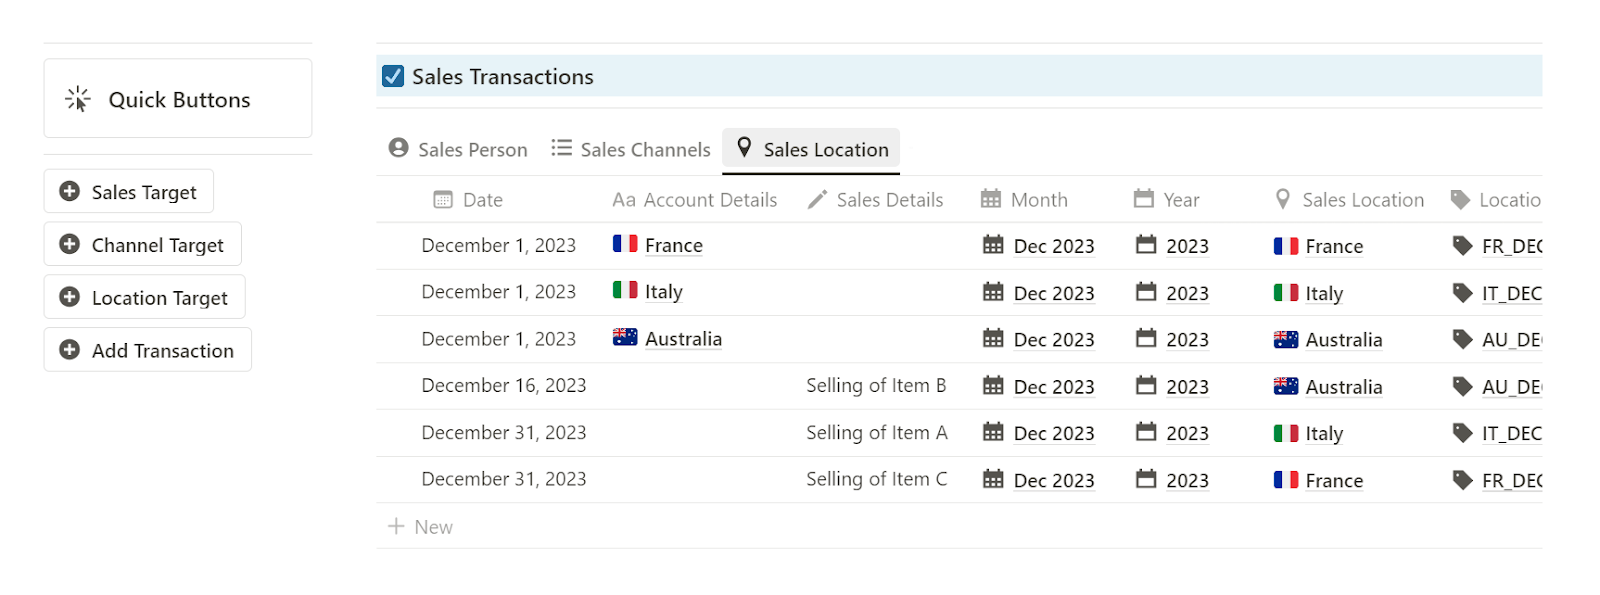
Under the Sales Channel, we can see all the sales transactions entered.
This includes addition of the sales location indicating where the sale was made.
An example would be Australia, France, Italy, etc.
There’s also a quick action button to the left, “Location Target”.
Here we can specify the sales target for each sales location at the start of the month.
For each sale made, we can add a location tag to add a tag to the sales location .
This can include the month and the year for which the sale was made.
How to download the Notion Sales Performance OS
Click Here to download Notion Sales Performance OS.
Now let’s see how you can use the template.
Entering Sales Transactions in the Sales Performance OS
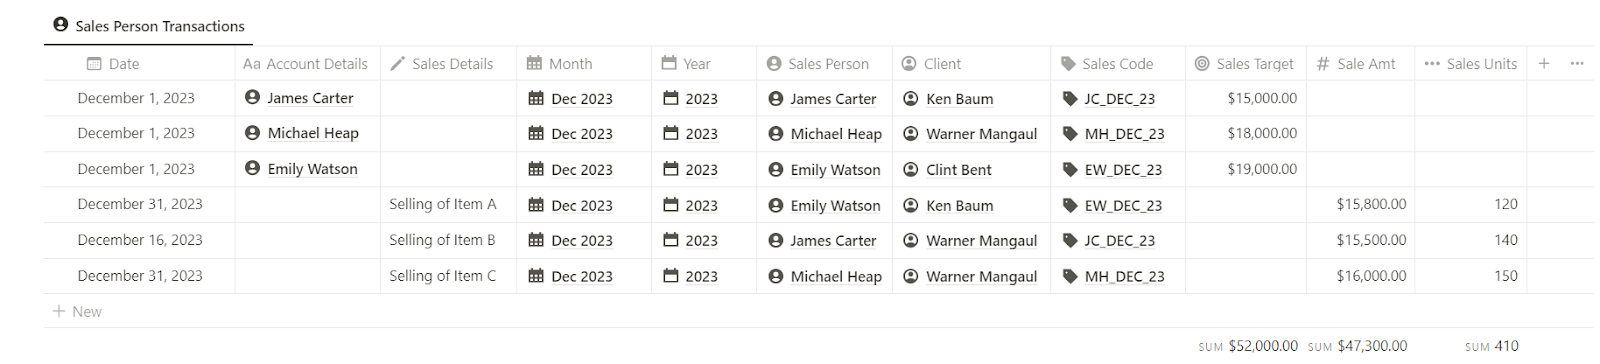
Under the “Sales Transaction” view, we get to enter the sales transactions (as shown above). Here are the things to consider while entering a transactions:
- Date – Enter the date of sale.
- Account Details – Enter the account details for which we are considering the sales value.
- Sales Details – Enter the desired detail of the sale transaction.
- Month – Select the period of sale such as “Jan 2024”.
- Year – Select the year of sale such as “2024”.
- Sales Person – Select the person’s name who is responsible for making the sale.
- Client – Select the Client name who is responsible for making the sale.
- Sales Code – Enter the unique sales code for the sales made. An example is JC_DEC_23 for sales made by James Carter on Dec 2023.
- Sales Target – Define the sales target for a particular month.
- Sale Amt – Enter the sales amount for the sales made for a particular month.
- Sales Units – Enter the sales units for a particular item sold (optional).
Read More : How to track credit card expenses in Notion
Summary
This template is super helpful, and users can customize it according to their needs.
This helps keep track of sales performance for each sales person, marketing channels and for locations as well.
Click Here to download and start using Notion Sales Performance OS right now.
FAQ
Here’s some of the most commonly asked questions on using Notion template:
Yes. Once you’ve made the purchase, you will get a link to duplicate this to your Notion workspace. You don’t need to be on Notion’s Personal Pro plan to use it.
Yes, Notion supports a lot of currencies and you can customize this template to your preferred currency.
Yes. Reach out to me at notionformyuse@gmail.com to know more.
Yes, we automatically upgrade all the templates to Notion Formula 2.0 by default.
This Notion template comes with a personal license for individual use. Feel free to use the template with your internal team. But please do not share it with other individuals.
After you make a purchase, we will provide you with the link to download the template.
After downloading the template, you will be able to duplicate it in your own workspace.
You’ll also receive an email with the link to the template and other relevant files.
Yes, write to us for a refund within 30 days of purchase if you didn’t find value in the template.
We’re passionate about making products people find value in and we’re confident in the value of this.